Halloween Witch Cookies
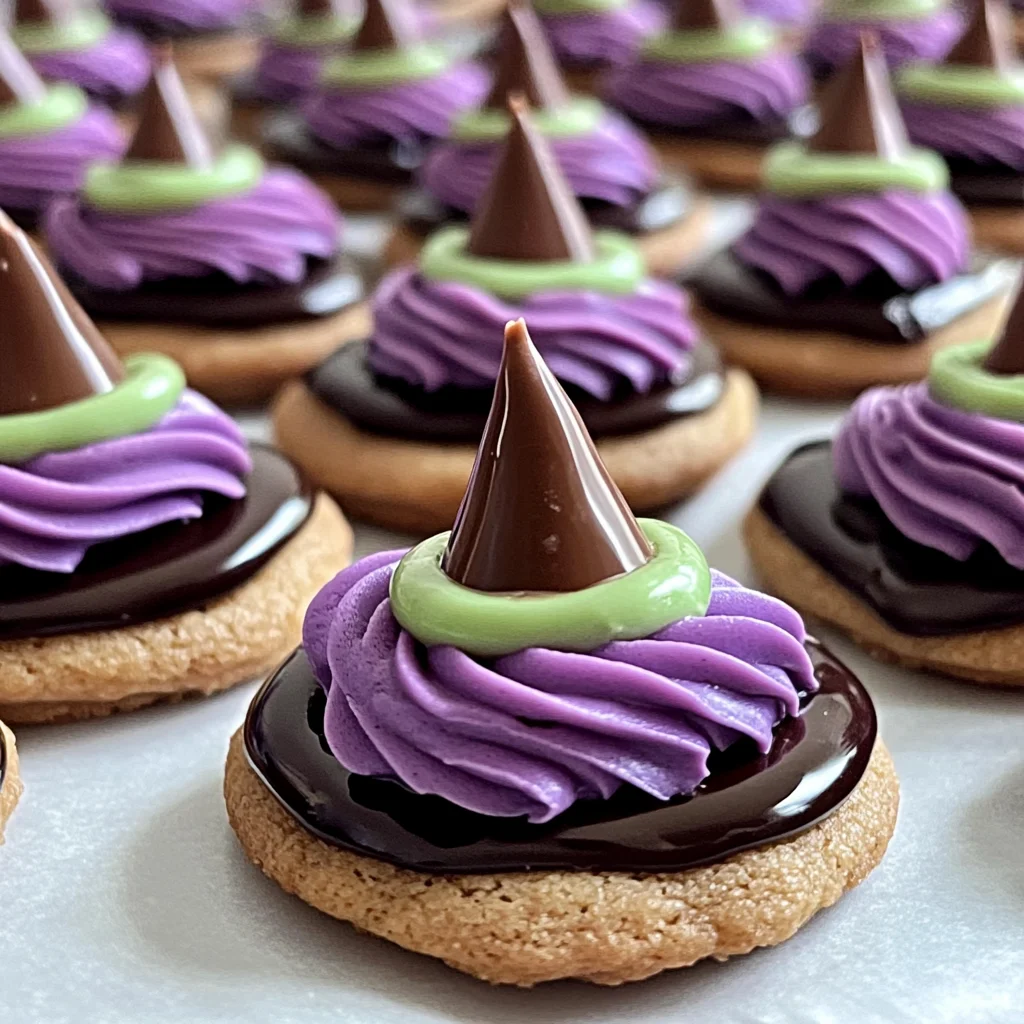
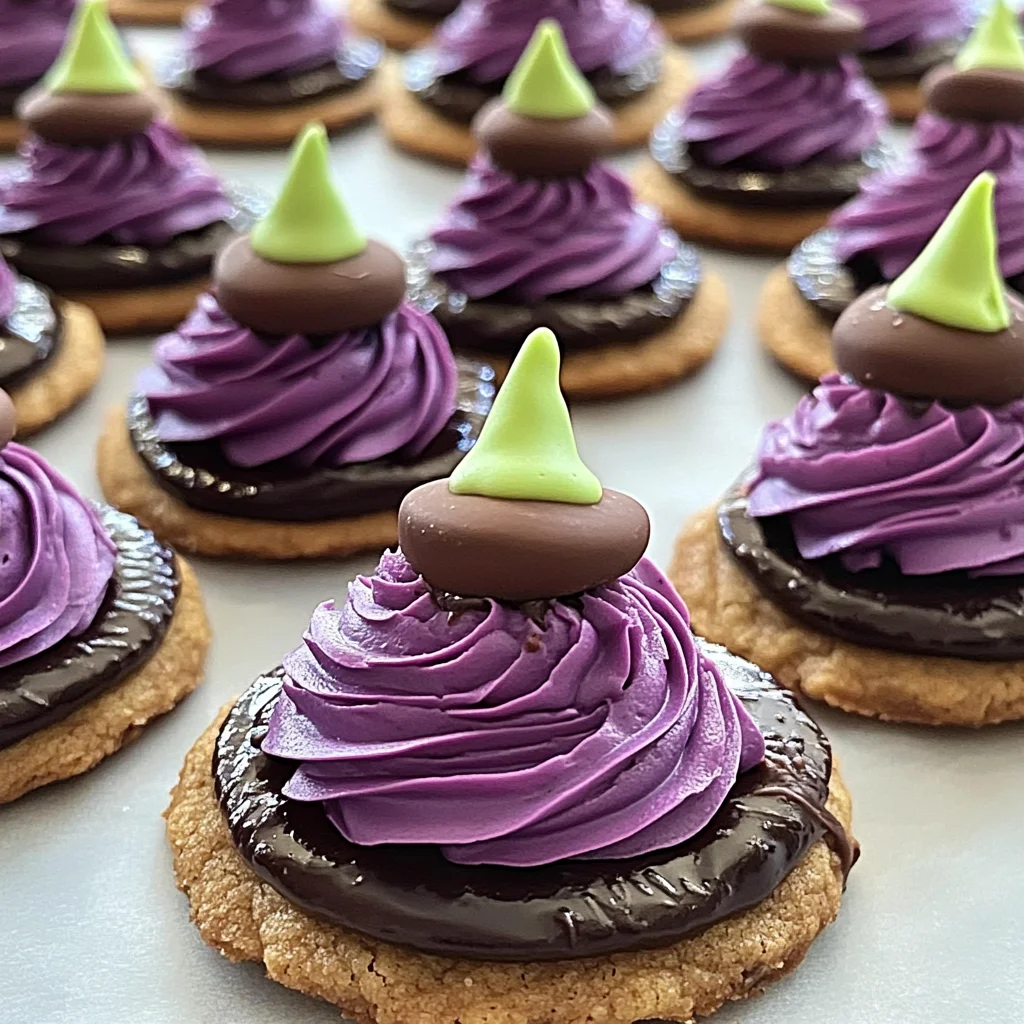
Get ready for a spooky celebration with these Halloween Witch Cookies! These adorable witch hat cookies are not only easy to make but also perfect for any Halloween gathering. With their delightful appearance and simple preparation, they bring festive fun into your kitchen. Whether for a party or a family treat, these cookies will surely charm everyone.
Why You’ll Love This Recipe
- Super Simple: With just three main ingredients, these cookies are quick to prepare, making them an ideal choice for busy schedules.
- Fun for All Ages: Involve the kids in decorating! Creating witch hats can be a delightful family activity.
- Festive Presentation: Their unique design makes them an eye-catching addition to any Halloween party spread.
- Customizable Topping: Use different colors of frosting to match your Halloween theme!
- Delicious Flavor: The combination of fudge cookies and chocolate Kisses creates a tasty treat that everyone will enjoy.
Tools and Preparation
Before you start making these enchanting cookies, gather your tools. Having everything ready will make the process smoother and more enjoyable.
Essential Tools and Equipment
- Baking sheet or wax paper
- Parchment paper
- Medium frying pan
- Piping bag (optional)
Importance of Each Tool
- Baking sheet or wax paper: Provides a clean surface for assembling your cookies, preventing messes.
- Parchment paper: Ensures that the cookies don’t stick, making cleanup easier.
- Medium frying pan: Ideal for gently melting the chocolate on the Hershey’s Kisses without burning them.
- Piping bag (optional): Perfect for adding decorative frosting around the Kisses if you want to get creative!
Ingredients
Get into the Halloween spirit with these adorably spooky Witch Hat cookies! Made with store-bought fudge striped cookies and topped with a Hershey’s Kiss, this easy Halloween treat is both delicious and fun to make.
For the Cookies
- 28 Fudge Striped Cookies
- 28 Hershey’s Kisses (unwrapped)
- Purple or Green Frosting (if desired)
How to Make Halloween Witch Cookies
Step 1: Prepare Your Surface
Flip all of the fudge striped cookies over and place them stripe-side down on parchment paper, wax paper, or a baking sheet.
Step 2: Melt the Chocolate
Warm a pan over medium heat. Once the pan is warm, touch the bottom of each Hershey’s Kiss to the pan long enough for the chocolate to melt slightly.
Step 3: Assemble the Cookies
Immediately place each melted Kiss, chocolate side down, on the center of each cookie over the hole in the middle. Repeat this process until all cookies are topped.
Step 4: Add Decorative Frosting (Optional)
If desired, use your piping bag to pipe a line of frosting around each Hershey’s Kiss on the witch hats. This adds extra detail and makes your cookies look even more festive!
Enjoy making these delightful Halloween Witch Cookies that bring both joy and deliciousness to your celebrations!
How to Serve Halloween Witch Cookies
These Halloween Witch Cookies are not only fun to make but also a delightful treat for any Halloween gathering. Here are some creative serving suggestions to enhance your spooky cookie presentation.
Display on a Festive Platter
- Arrange the cookies on a themed platter, such as one with Halloween designs. This adds visual appeal and invites guests to indulge.
Pair with Spooky Beverages
- Serve alongside fun drinks like ghostly lemonade or pumpkin spice hot chocolate to complement the festive atmosphere.
Create a Cookie Decorating Station
- Set up a DIY station where guests can decorate their own witch hat cookies with various toppings, such as sprinkles or colored frosting.
Use as Party Favors
- Package each cookie in clear bags tied with ribbon for guests to take home. A sweet treat they’ll remember long after the party ends!
How to Perfect Halloween Witch Cookies
To ensure your Halloween Witch Cookies turn out perfectly every time, follow these helpful tips for a spooktacular treat.
- Choose Quality Cookies: Using fresh fudge striped cookies will make a significant difference in flavor and texture.
- Melt Carefully: When warming the Hershey’s Kisses, be cautious not to overheat; just a few seconds will do to avoid burning.
- Add Colorful Frosting: For an extra pop, use purple or green frosting around the Kisses for added decoration and flair.
- Keep It Simple: Don’t stress about perfection; the charm of these cookies comes from their playful appearance.
- Store Properly: Keep cookies in an airtight container at room temperature for up to a week for best freshness.
Best Side Dishes for Halloween Witch Cookies
These cookies pair well with various side dishes that add to the festive spirit of Halloween. Here are some great options you might consider serving:
- Pumpkin Soup: A warm and creamy soup that offers comforting flavors perfect for autumn gatherings.
- Cheesy Spider Web Dip: A delicious cheese dip decorated with sour cream spider webs, served with tortilla chips for dipping.
- Witch’s Brew Punch: A refreshing punch made with fruit juices and fizzy soda, garnished with floating gummy worms.
- Ghostly Veggie Platter: A selection of seasonal vegetables arranged like ghosts, served with hummus or ranch dressing.
- Monster Meatballs: Bite-sized meatballs dressed up with googly eyes made from olives—fun and tasty!
- Candy Corn Salad: A colorful salad made with corn, black beans, and peppers layered like candy corn for a festive touch.
- Frankenstein Fruit Cups: Individual cups filled with mixed fruit and topped with whipped cream faces, perfect for kids’ parties.
- Spider Crackers: Snack crackers topped with spreadable cheese and olive slices to resemble cute little spiders.
Common Mistakes to Avoid
Making Halloween Witch Cookies can be fun, but avoid these common mistakes for the best results.
- Not using the right cookies – Always use fudge-striped cookies for that perfect witch hat look. Substituting with other cookie types may not create the desired effect.
- Overheating the Hershey’s Kisses – If you heat the Kisses too long, they might melt too much and lose their shape. Just a few seconds on low heat is enough to soften them for sticking.
- Skipping the frosting – While optional, adding frosting can enhance both appearance and flavor. Don’t skip this step if you want your cookies to look extra festive.
- Not letting cookies cool before decorating – Decorating warm cookies can cause the frosting to melt. Allow your cookies to cool completely before piping any designs.
- Ignoring presentation – The visual appeal of your Halloween Witch Cookies matters. Use colorful sprinkles or additional frosting to make them stand out.
Storage & Reheating Instructions
Refrigerator Storage
- Store cookies in an airtight container to maintain freshness.
- They will last up to 5 days in the refrigerator.
Freezing Halloween Witch Cookies
- Place cookies in a single layer in a freezer-safe container.
- They can be frozen for up to 2 months. Thaw in the refrigerator before serving.
Reheating Halloween Witch Cookies
- Oven – Preheat to 350°F (175°C) and warm for about 5 minutes.
- Microwave – Heat for 10-15 seconds for a soft bite; don’t overdo it!
- Stovetop – Place on low heat in a pan, covered, for 1-2 minutes, checking frequently.
Frequently Asked Questions
Here are some common questions about making Halloween Witch Cookies.
How do I make my Halloween Witch Cookies look more festive?
Adding colorful sprinkles or using different colored frostings can enhance their appearance and make them more festive.
Can I use other types of chocolate candies instead of Hershey’s Kisses?
Yes! You can substitute with any round chocolate candy that melts well, like chocolate-covered caramels or truffles.
What can I use instead of fudge striped cookies?
While fudge striped cookies are ideal, you could try other similar textured cookies, but it may change the overall look and taste slightly.
How long do Halloween Witch Cookies stay fresh?
When stored properly in an airtight container, they remain fresh for up to 5 days at room temperature or longer if refrigerated or frozen.
Final Thoughts
These Halloween Witch Cookies are not only adorable but also incredibly easy to make. They serve as a delightful treat for parties or just as a fun activity with family. Feel free to customize them with different colors of frosting or toppings to match your theme!
Halloween Witch Cookies
Get ready to enchant your Halloween celebrations with these delightful Halloween Witch Cookies! These whimsical witch hat treats are not only visually appealing but also incredibly easy to make, making them a perfect activity for families and a festive addition to any gathering. With just three simple ingredients, you can create a spooky dessert that will charm both kids and adults alike. The delicious combination of fudge striped cookies topped with melted chocolate candy brings joy and flavor to your holiday festivities. Decorate them with colorful frosting for an extra pop of flair and watch as they become the star of your Halloween party!
- Prep Time: 15 minutes
- Cook Time: 5 minutes
- Total Time: 20 minutes
- Yield: Makes approximately 28 cookies 1x
- Category: Dessert
- Method: Baking
- Cuisine: American
Ingredients
- 28 Fudge Striped Cookies
- 28 Hershey's Kisses (unwrapped)
- Purple or Green Frosting (optional for decoration)
Instructions
- Prepare your surface by placing the fudge striped cookies stripe-side down on parchment paper or a baking sheet.
- Melt each Hershey's Kiss slightly by touching the bottom to a warm medium frying pan for just a few seconds.
- Assemble the cookies by placing each melted Kiss on the center hole of a cookie, pressing down gently.
- If desired, pipe decorative frosting around each Kiss for added detail.
Nutrition
- Serving Size: 1 cookie (28g)
- Calories: 140
- Sugar: 10g
- Sodium: 50mg
- Fat: 6g
- Saturated Fat: 3g
- Unsaturated Fat: 2g
- Trans Fat: 0g
- Carbohydrates: 19g
- Fiber: 0g
- Protein: 1g
- Cholesterol: 0mg